Record your first test
This walkthrough uses the Trq desktop app — download it for macOS if you don't have it yet.
Launch the Trq app (⌘-Space → "Trq", or from Applications). You'll go from an empty folder to a recorded, replayable test in about a minute — no code.
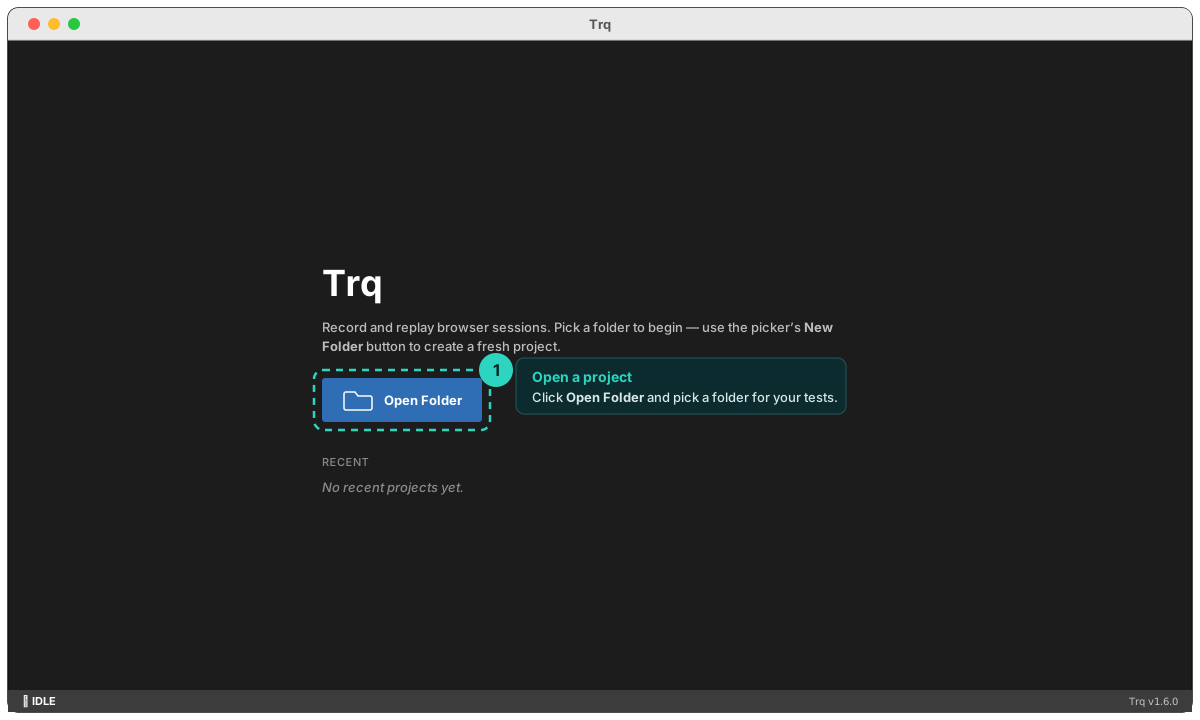
1. Open a project
On the welcome screen, click Open Folder and pick (or create) a folder where your tests will live. Each session you record is saved there as a single .trq file, so a project is just a folder of .trq files.
2. Create a session
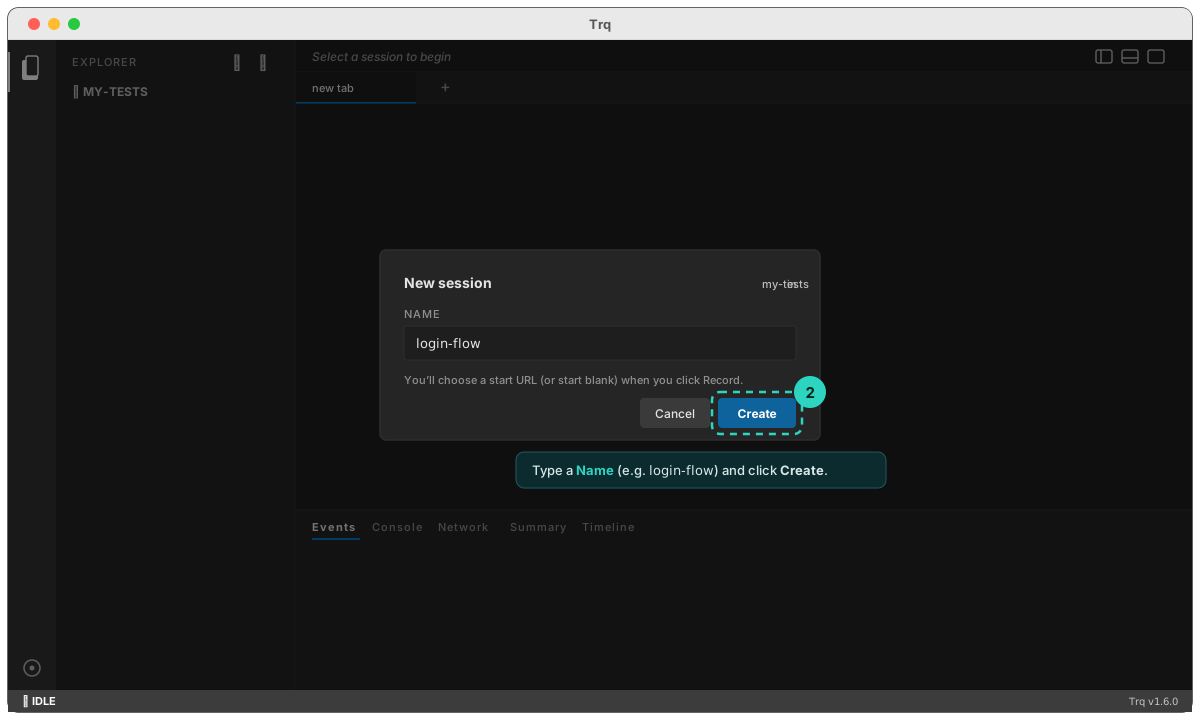
In the EXPLORER sidebar, click the + New session button (or right-click the project → New session). Give it a Name like login-flow and click Create. There's no URL field here — you choose where to start when you hit Record.
3. Record
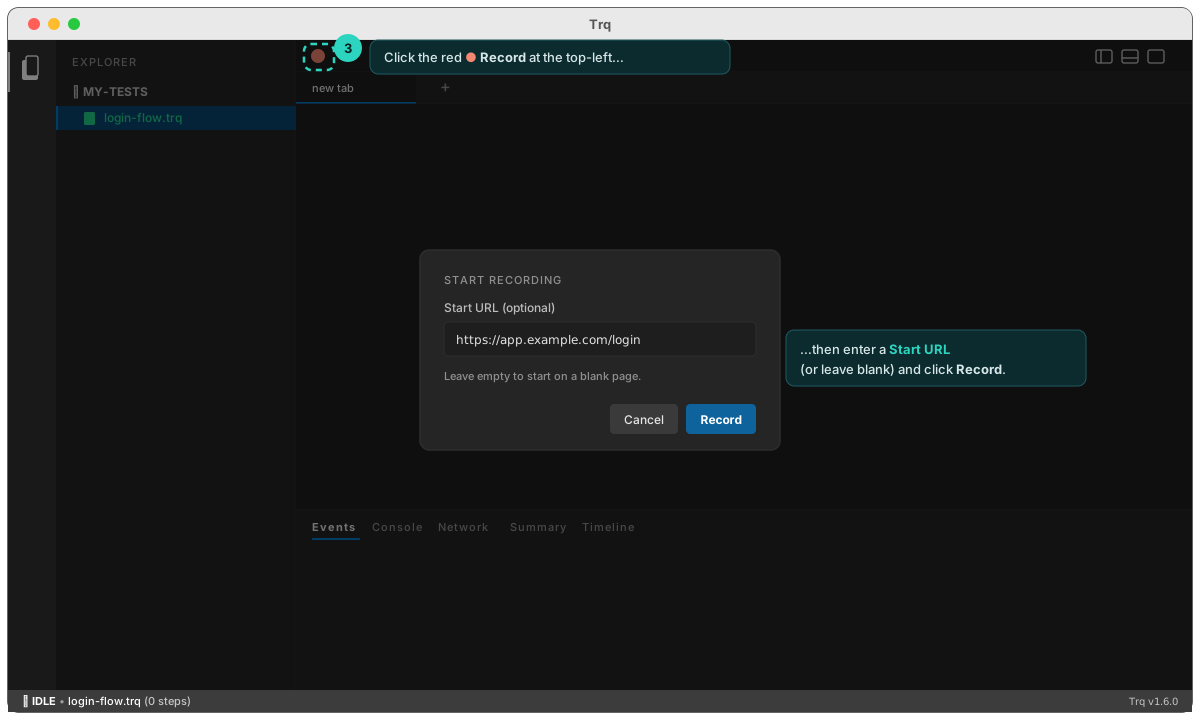
With login-flow.trq selected, click the red ● Record button at the far left of the top toolbar. Trq asks where to begin — type the page (e.g. https://app.example.com/login) and click Record, or leave it blank to start on a blank page (handy when an API request produces the first URL).
That URL isn't stored as a session property: opening it is recorded as the session's first navigate step, which you can edit, template or delete like any other.
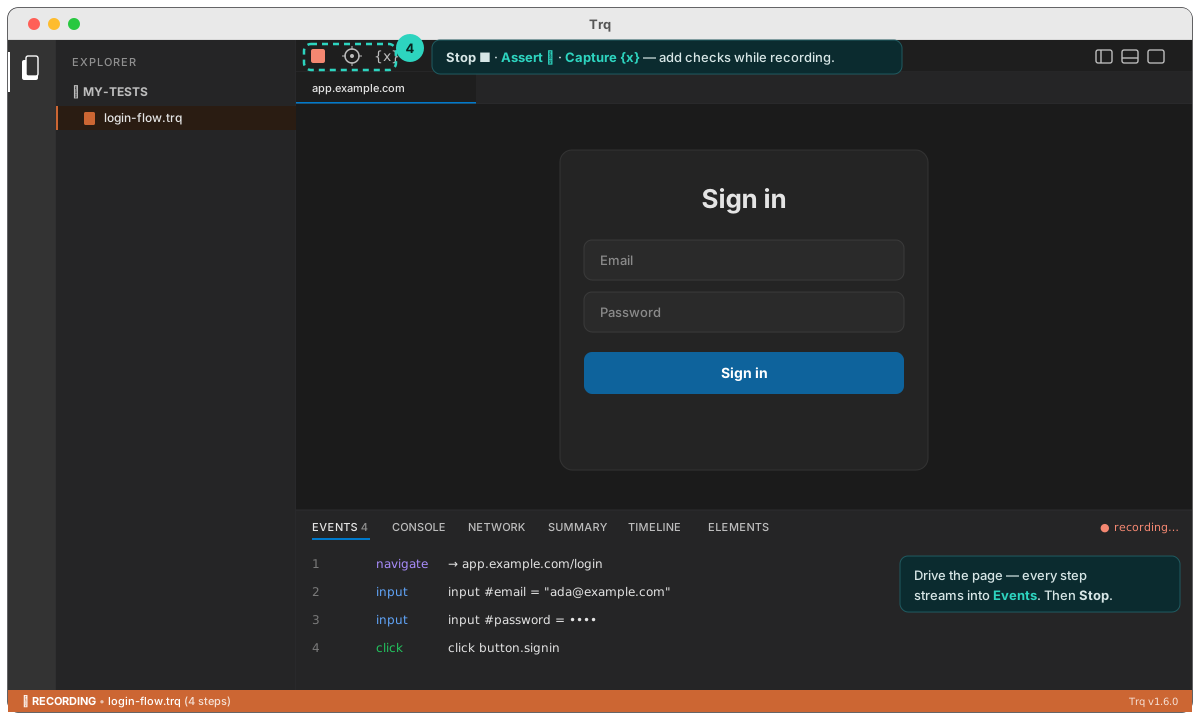
Trq opens that URL in the embedded browser and switches into recording mode — the status bar turns orange. Now drive the page like a normal user: type, click, submit. Every action streams into the Events panel at the bottom, and the toolbar gains Assert ✛ and Capture {x} so you can add checks and pull values out of the page as you go.
4. Stop
Click ■ Stop in the toolbar when you're done. Your steps are saved straight to the .trq file.
5. Play it back
Back at idle, click ▶ Play. Trq clears the browser's cookies, storage, and caches, then replays your flow from step 1 — deterministically. Each step turns green with its timing, and the Events header shows ✓ all passed.
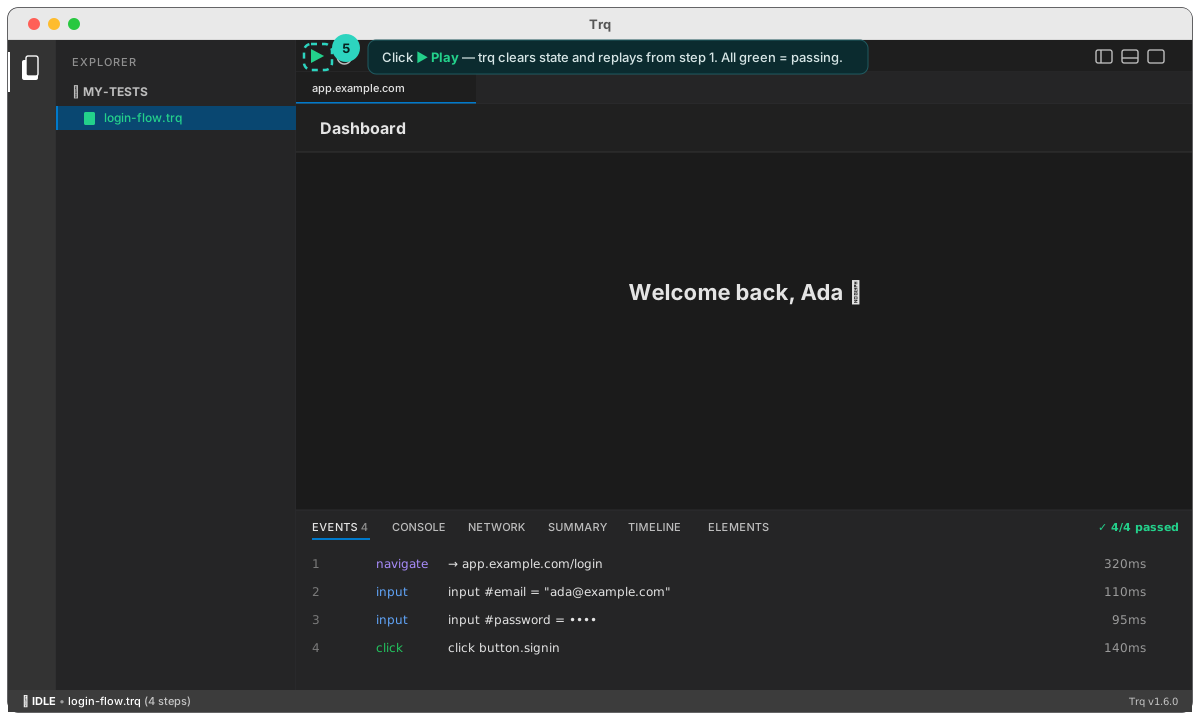
That's a complete test — recorded, saved, and repeatable. Next: author assertions and captures while you record, so your tests check the right things.