Authentication
The Auth tab attaches credentials to a request without you hand-writing the header. Pick a scheme from Auth type and fill its fields; Trq materializes the right header (or query param) when the request fires. Every field is templatable, so credentials come from a captured variable or an environment rather than being hard-coded.
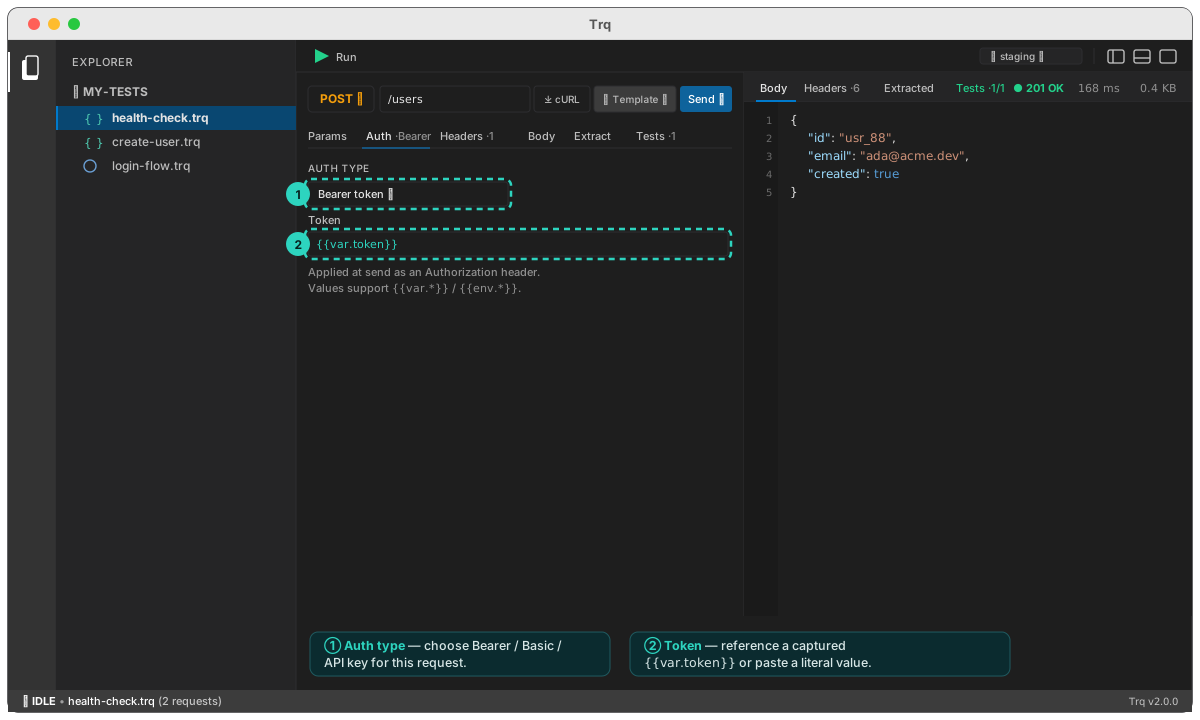
Auth types
- No auth — the default; nothing is added.
- Bearer token — sends
Authorization: Bearer <token>. Point Token at a captured value like{{var.token}}from a prior login request, or paste a literal. - Basic auth — sends
Authorization: Basic <base64(user:pass)>. Fill Username and Password; Trq encodes them at send time. - API key — sends a key/value pair either as a Header or a Query param (choose under Add to). Set the Key (e.g.
X-Api-Key) and Value (e.g.{{env.API_KEY}}). - OAuth 2.0 (client credentials) — fetches a token from the identity provider and sends it as a Bearer. See below.
Applied at send
Auth is resolved the moment the request fires — templates in the fields are expanded, then the header or query param is added. That means:
- A Bearer token captured by an earlier request in the case is live for every request after it.
- Putting the value in an environment (
{{env.API_KEY}}) lets the same request authenticate against dev, staging, and prod with different keys.
Prefer {{env.*}} or a captured {{var.*}} over pasting a literal secret. Environment values and captured variables aren't baked into the request the way a typed-in token would be.
OAuth 2.0 — client credentials
Machine-to-machine APIs usually want a token you fetch rather than one you hold. Without this you would write the token exchange as its own request, extract the token, and reference it from every later request — which works, and is three things to maintain.
Picking OAuth 2.0 (client credentials) collapses that into the Auth tab.
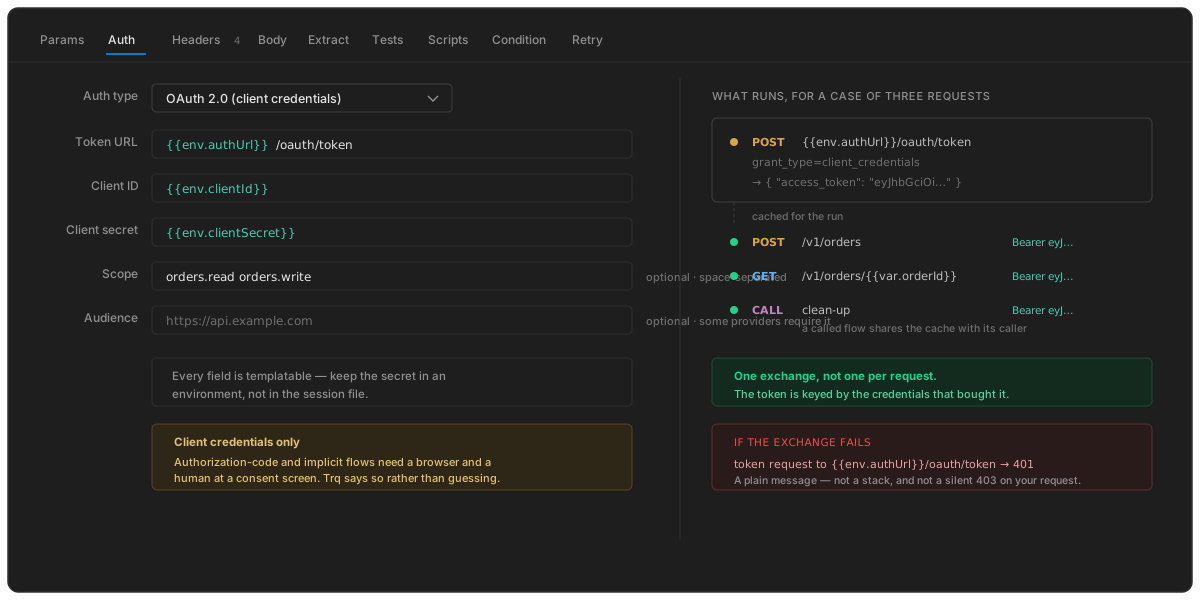
Step by step
1. Choose the scheme
Select a request, open Auth, and set Auth type to OAuth 2.0 (client credentials).
2. Fill the four fields
| Field | Example | |
|---|---|---|
| Token URL | {{env.authUrl}}/oauth/token | where the exchange happens |
| Client ID | {{env.clientId}} | |
| Client secret | {{env.clientSecret}} | keep it in an environment, not in the file |
| Scope | orders.read orders.write | optional, space-separated |
| Audience | https://api.example.com | optional; some providers require it |
Every field is templatable, so the same request authenticates against dev, staging and prod with different credentials.
3. Run
Before the request is sent, Trq posts grant_type=client_credentials to the token URL, reads access_token from the response, and attaches it as Authorization: Bearer <token>. Your request's own URL, body and tests are untouched.
One token, not one per request
The token is cached for the run, keyed by the credentials that bought it. A case with twenty requests against the same provider does one exchange, not twenty — and a call flow shares the cache with its caller, so calling three flows does not fetch four tokens.
Variables and flow scopes are isolated from each other on purpose; the OAuth cache is deliberately not, because a token is identified by the credentials it came from and there is nothing to collide.
If the exchange fails
A token endpoint that returns 401, or a response with no access_token in it, fails the step with a plain message naming the token URL and the status. It does not fail with a stack trace, and it does not send your request without credentials and let you puzzle over the 403.
What is not supported
Only the client credentials grant. The authorization-code and implicit flows need a browser and a human at a consent screen, which is a different feature — Trq tells you so when a spec declares one rather than mapping it to Bearer and generating twenty requests that all 401.
Next: choose a request body, or see how variables chain a login token into every later request.